Installation
Showing the single result
-
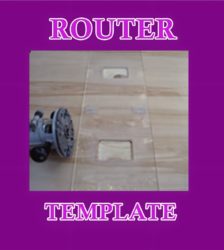
Installation Router Template
$300.00Quick ViewTemporarily on backorder
How to Install the Great Yoga Wall
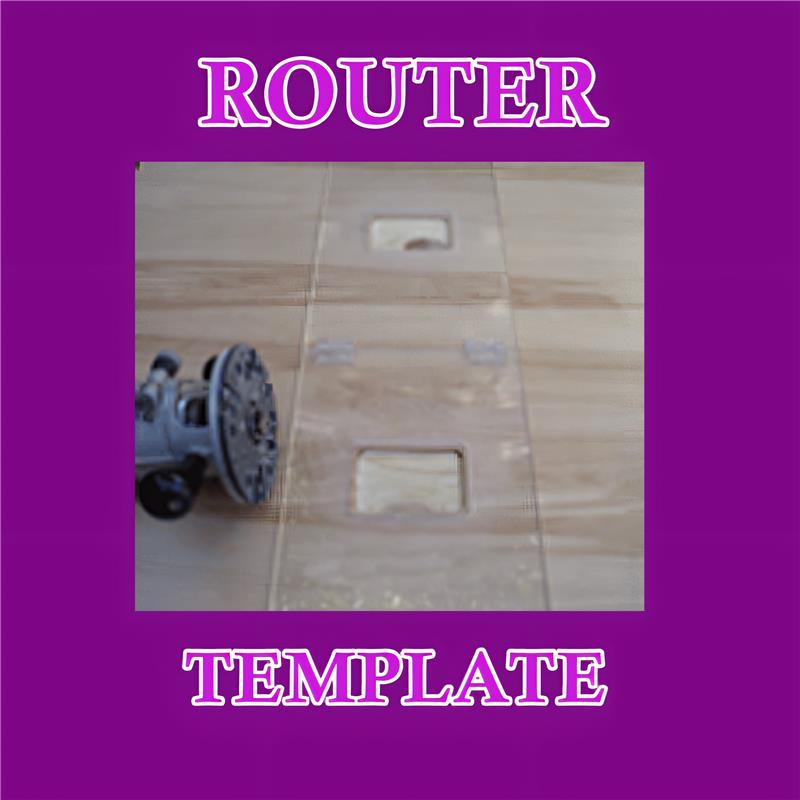
The YOGA WALL® is designed around our patented ball and socket hardware system. You mount the spring-loaded socket wall plate into 3/4″ hardwood veneer plywood. The wall belts and bars snap into the wall plates with a brass ball. This system allows for tremendous flexibility of use. The basic setup has 3 rows of wall plates. The deluxe setup has 5 rows of plates. The plates are mounted to the plywood in columns 16″ apart. The plywood is then attached to a wall by bolting 2″x4″s horizontally into existing wall studs and then screwing the plywood into the 2x4s. We have a template available, used with a router, to prepare the plywood for the wall plates.
You Purchase the Plywood at Your Local Lumbar Yard
- Router, one that will accommodate the universal base plate” we provide.
- Router Template
- 3/4″ double flute straight cutting bit.
- Pistol drill.
- Saber saw.
- 5/16″ drill bit.
- 1 & 3/8 ” butterfly bit or hole cutter (preferable)
- Allen wrench.
- Socket wrench.
- “C” clamps, (at least two).
Installation Router Template
The template is used to exactly cut out the holes into 3/4″ plywood for the Wall Plates. The template spaces the Wall Plates exactly 16″ apart across the plywood. This exact spacing is necessary for use of the Wall Bar. There is a $300.00 refundable deposit to use the template free for 3 weeks. Thereafter $20.00 per week is charged until the template is returned.
How to use the Template (Click Here For Pics)
Templates available to rent for our customers who have purchased Yoga Wall plates.