Description
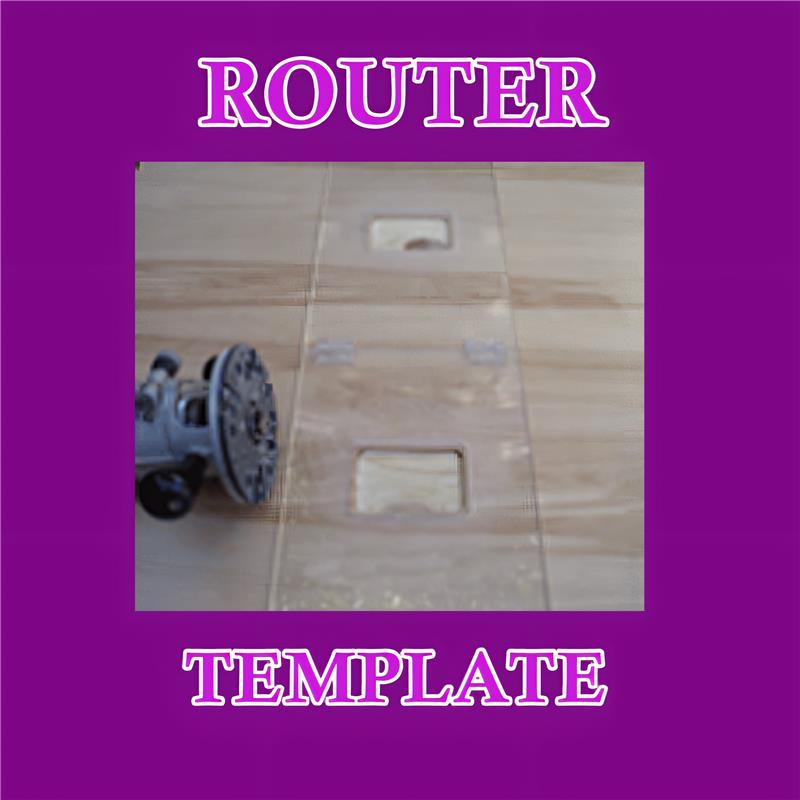
Setting Up the Router
- Remove the base plate from your router and install the “universal” (supplied with the router template) base plate with the routing bushing.
- Install the 3/4″ router bit in the router.
- Set the depth for a 3/16″ deep cut. Make sure you allow for the thickness of the template the router rides on. Try some sample cuts on scrap plywood to ensure adjustments have been made properly. How to Install Wall Plates (click here)
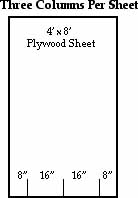
Working with Plywood
- Place your sheet of 3/4″ plywood across a pair of horses with the finished side up.
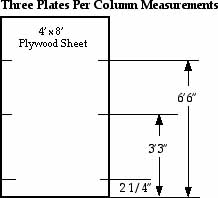
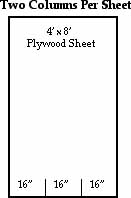
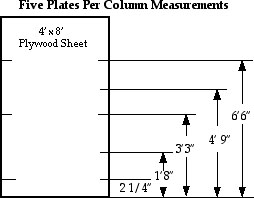
- Measure marks from the bottom:
- Place the template on the plywood so that the “center line” is on the marks you measured. Clamp the template snugly to the ends of the plywood. If the template moves, the plywood is trashed.
- Run the router around each of the openings in the template. Keep wood chips and dust away from template as you router.
- Drilling the holes: Drill 6 holes in each recess. To find the centers, place the “Hole Marker Plate” into each recess and use a pencil to mark the centers to drill.
- Use the 5/16 drill bit to drill the four corner holes. Use the 1 &3/8″ butterfly bit or hole saw to drill out the two center holes. You may need to cut them just a “tad” to give you a little play.
- Install hardware: Place the facing plate into the recess with the small hole down. Put the backing plate in place with the spring pointed down. Bolt in place with the nuts and bolts provided. Make sure the plates line up by putting a Wall Belt into the facing plate. The brass ball should sit evenly in the small hole. If not, adjust the black plate until the brass ball sits evenly in the small hole.How to Install Wall Plates (click here)
Measurements
|
Standard 3 Row Station
Single Station
|
Deluxe 5 Row Station
One and One half Stations
|
Mounting the Finished YOGA WALL® to Your Wall
The wall plates are made up of two parts, a front plate and a back plate. The back plate sticks out 3/4″ from the plywood. Therefore the plywood must be mounted away from your wall. This is done by bolting 2″x4″s onto your wall and screwing the plywood into the 2″x4″s. The 2″x4″s can be mounted horizontally or vertically onto your wall. Horizontal works best for multiple stations and makes it easier to place the YOGA WALL® on the wall. Four or five 2″x4″s are used for a horizontal setup.
Wood stud wall installation:
- Find the centers of the studs in the wall. Put the 2″x4″s flat onto the wall and bolt them into the center of the wall studs with 3/8″ x 3 1/2″ lag bolts. Counter sink the lag bolts.
- Drill holes in the plywood for #10 wood screws 2″ to 21/2″ long. Counter sink these holes. The holes should be spaced about 10″ apart for horizontal or 16″ apart for vertical installation.
- Place the plywood on the wall and screw into the 2″ x 4″s
- Finish the edges as desired.
Masonry wall or Metal stud installation :
If you have a masonry wall or metal studs in your wall, we recommend you contact a carpenter and ask him if he can bolt 2″x4″s to your wall. After the 2″ x 4″s are attached to your wall the installation is the same as for a wood stud wall.
Templates available to rent for our customers who have purchased Yoga Wall plates.